FreeCAD: Stress Analysis (2/3)
Condition settings
-
Creating analysis case
Switch workbench to FEM workbench
 and create new analysis
 .
. -
Material setteings
We will set a material for analysis in this section. At first, select material setting tool
 . Then select "ABS-Generic" as "Material card" and click to close the dialog. ABS is a kind of resin and one of the most common material used in 3D printings.
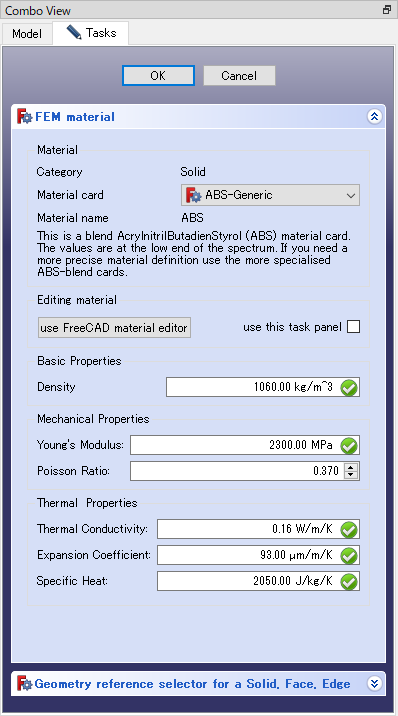
Material setteing dialog In addition to ABS, you can use Aluminum alloy, steel, concrete, glass, PLA or wood etc. as material. It is also possible to set any Young's modulus, Poisson's ratio, density, etc. values for material.
-
Fixed condition settings
Select fixed condition
 . Select the face of the screw hole at the lower Y coordinate in the 3D view and click Add on the dialog to set fixed condition. Red pins will be shown on the face with fixed condition. After settings, click OK to close the dialog.
Fixed condition setting dialog 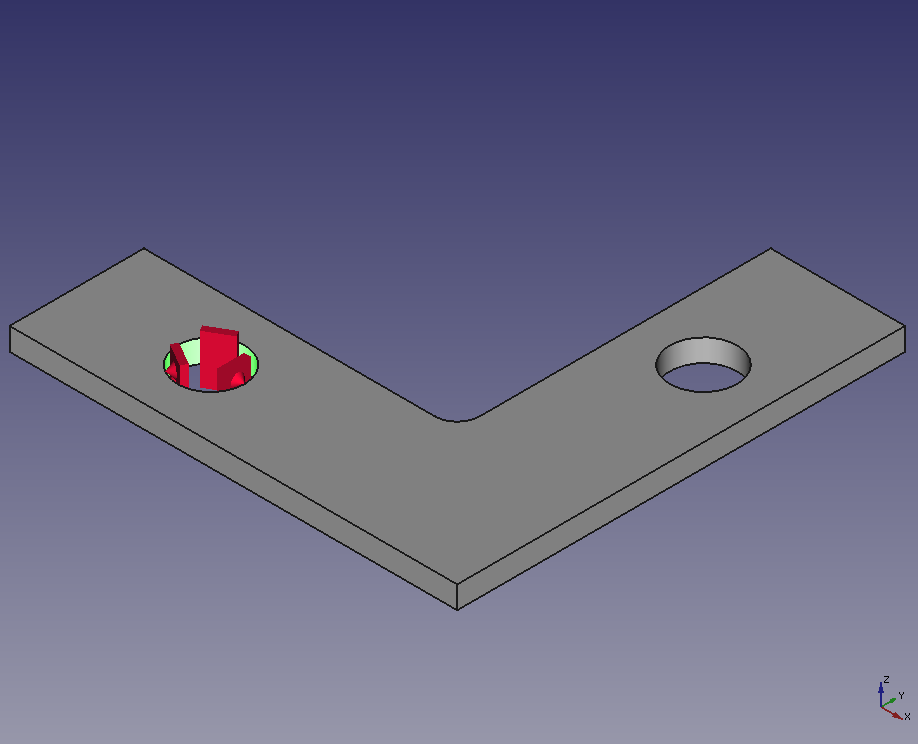
Displaying on 3D view -
Force condition settings
Select force condition
 . Select the face of the screw hole at the upper Y coordinate in the 3D view and click Add on the dialog to set force condition. Red arrows will be shown on the face with force condition.
Enter "500" at "Load". The force unit is N (Newton).
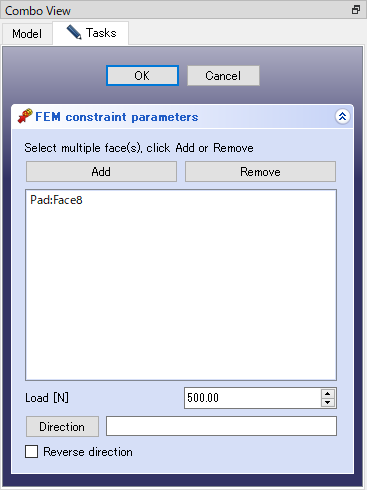
Force condition setting dialog 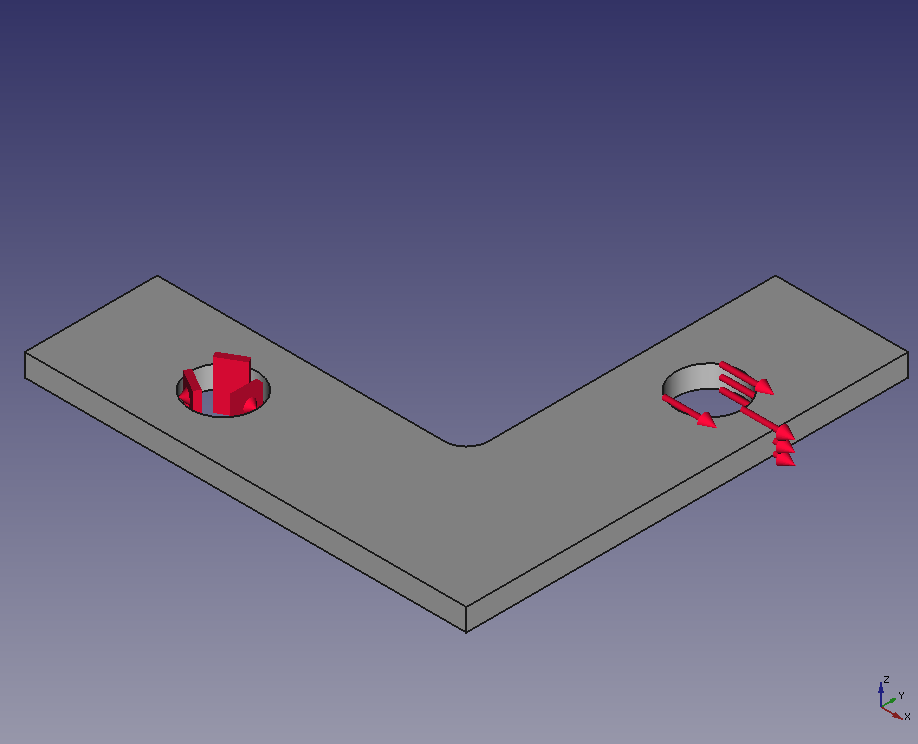
Displaying on 3D view If you want to change the direction of the force, click and then select the edge in the 3D view that you want to specify. You can also check "Reverse direction" to reverse the direction of the force.
When all settings is done, click OK to close the dialog.
-
Creating meshes
Select the shape (Body) to be analyzed on model tree and run creating mesh with Netgen
 .
.At first, set "Max. Size" to "5" on task tab. Then confirm that "Second order" has been checked. By this option, second-order elements with high computational accuracy (but costs more computational time) will be used.

1st-order tetrahedron element 
2nd-order tetrahedron element Confirm the mesh fineness has been set to "Moderate" and click . If there is no problem with the mesh shown in the 3D view, click to close the dialog.
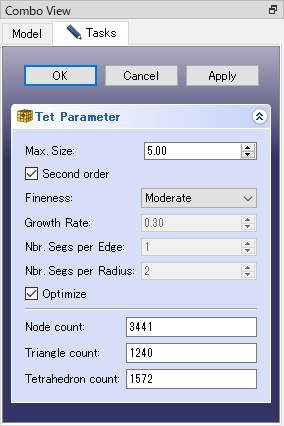
Netgen meshing dialog 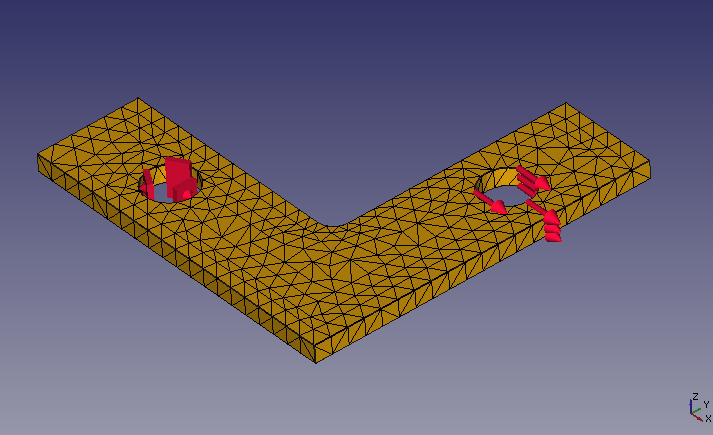
Meshes for analysis The parameters are as follows:
Parameters Max. Size Maximum size of an element Second order Generate 2nd-order elements or not Fineness Mesh fineness. Possible settings are "Very Coarse", "Coarse", "Moderate", "Fine", "Very Fine" or "User Defined". Growth Rate Growth rate for neighbor mesh Nbr Segs per Edge Number of segments per edge Nbr Segs per Radius Number of segments per radius Optimize Do optimization or not -
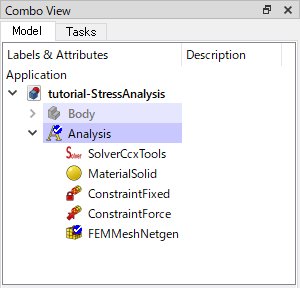
The model tree after these settings
The material and conditions are added under "Analysis" in the model tree. If you want to change these conditions, double-click the item in model tree and change parameters. If you want to delete these conditions, select the item in model tree and press Delete key.
The model tree after these settings
Running calculation
Double-clcik " SolverCcxTools" in model tree to show a dialog for running calculation.
Confirm that "Static" has been selected as analysis type.
Click "Write .inp file" to write input file and click "Run CalculiX" to start calculation. When the calculation is finished successfully, messages as "CalculiX done without error!" and "Loading result sets..." will be displayed in the text area at the bottom of the dialog, so click to close the dialog.

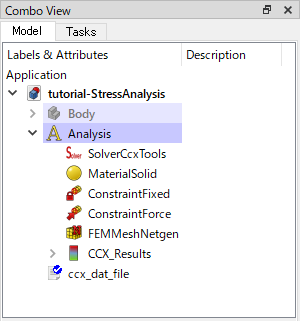
After calculation, "CCX_Results" and "ccx_dat_file" items will be added to model tree as analysis result.
The next step is to view analysis result and to improve the shape.